DMDX Help.
How to use DMDX
If you aren't using the Auto mode shortcut
(DMDX's title bar will tell you if Automode is active) and you installed DMDX
you will have to use TimeDX version 5 to
establish operating parameters and store
them in the registry. Otherwise DMDX can be run immediately.
If you didn't install DMDX and are running DMDX.EXE from some directory other
than a Program Files one it will also assume auto mode is active to facilitate
running DMDX from memory sticks and so forth where creating shortcuts can be a
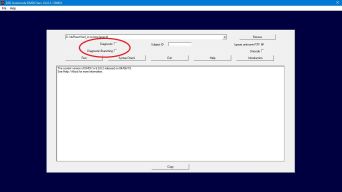
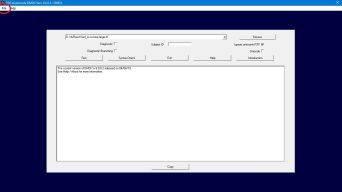
bit entertaining. This is what it's main screen
looks like under Windows 10 circa 2019:
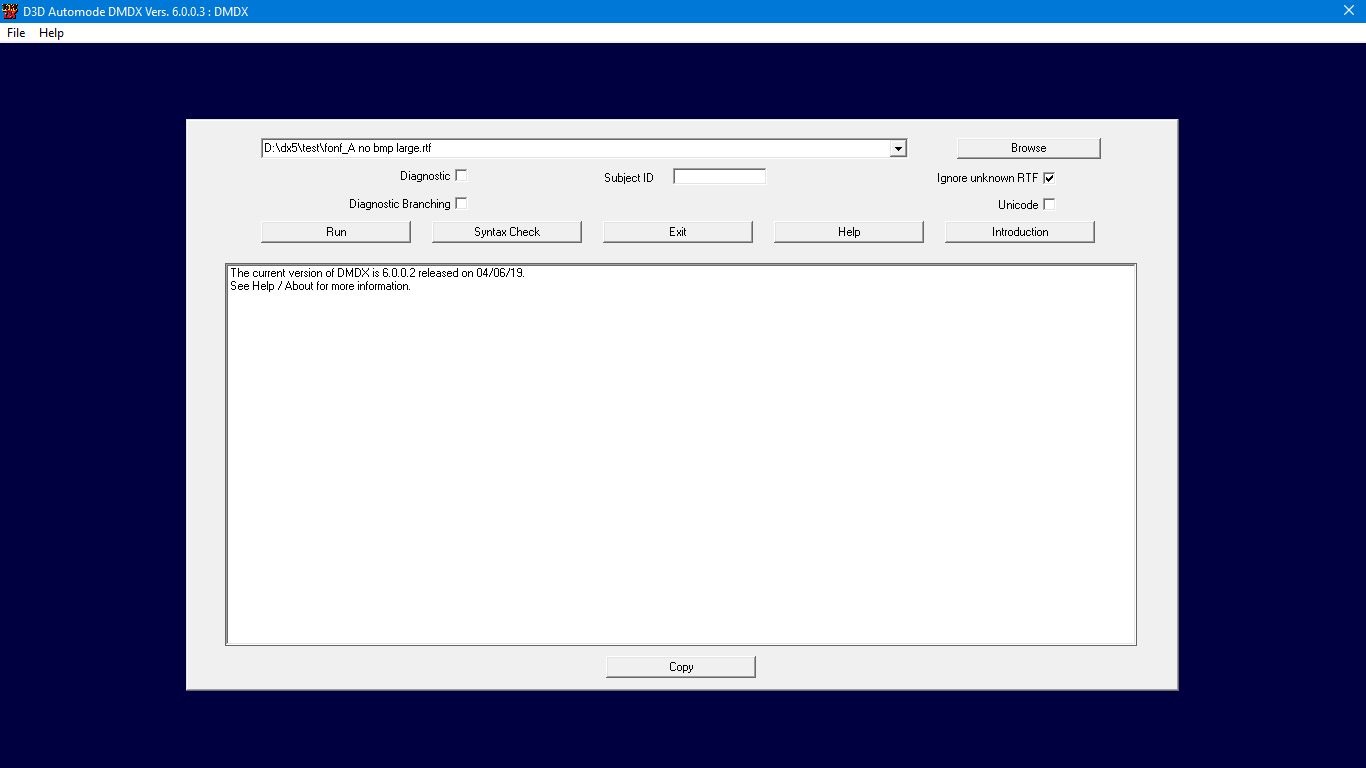
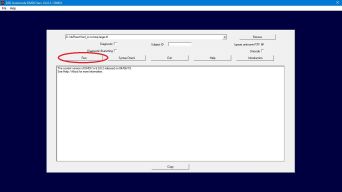
 When DMDX is first run it now pings our server (psy1.psych.arizona.edu)
looking for the current version number
of DMDX and if the copy you are running is not the most recent version it
displays the text message you can see in the list box advertising that a new
version of DMDX is available (here of course the version number is earlier
than our version as I'm capturing images of the latest development version
prior to releasing it). If you need to update the latest installer
is at
https://psy1.psych.arizona.edu/~jforster/dmdx/DMDX.ZIP.
When DMDX is first run it now pings our server (psy1.psych.arizona.edu)
looking for the current version number
of DMDX and if the copy you are running is not the most recent version it
displays the text message you can see in the list box advertising that a new
version of DMDX is available (here of course the version number is earlier
than our version as I'm capturing images of the latest development version
prior to releasing it). If you need to update the latest installer
is at
https://psy1.psych.arizona.edu/~jforster/dmdx/DMDX.ZIP.
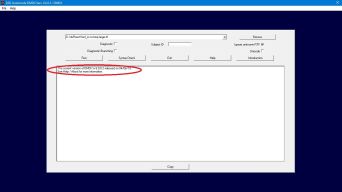
 Or as
suggested you can use Help / About and it'll pop up the same message with
suggestions to click on the Upgrade button which will make Windows download
the psy1 copy of the installer and you can exit DMDX and install the new
version.
Or as
suggested you can use Help / About and it'll pop up the same message with
suggestions to click on the Upgrade button which will make Windows download
the psy1 copy of the installer and you can exit DMDX and install the new
version.
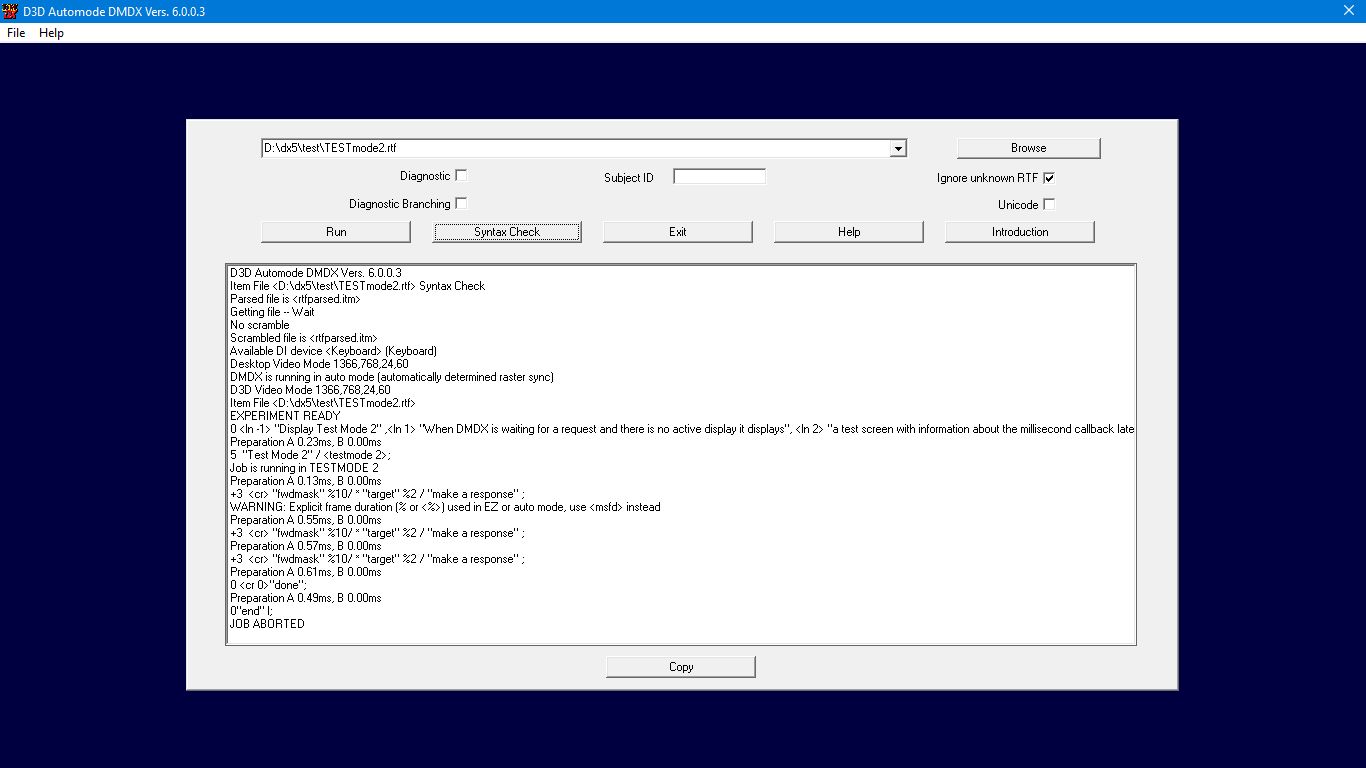
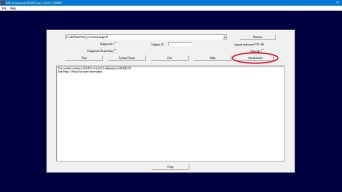 As of version 5.3.1.0 of DMDX there's a new
Introduction button on the right that will run an item file that's baked
into the DMDX executable that introduces people to the basic
capabilities of DMDX and will then go on to cover most of the tools to do
almost any of the other things anyone might like to do -- including running some of DMDX's test
modes allowing someone to rapidly check whether that machine will be any good
for running DMDX without needing additional item files. Just click the button and it will run.
The text of the introduction is now available here
if you to want to examine some section of it in more detail or if you wish to
copy and paste any of it's examples into an item file.
As of version 5.3.1.0 of DMDX there's a new
Introduction button on the right that will run an item file that's baked
into the DMDX executable that introduces people to the basic
capabilities of DMDX and will then go on to cover most of the tools to do
almost any of the other things anyone might like to do -- including running some of DMDX's test
modes allowing someone to rapidly check whether that machine will be any good
for running DMDX without needing additional item files. Just click the button and it will run.
The text of the introduction is now available here
if you to want to examine some section of it in more detail or if you wish to
copy and paste any of it's examples into an item file.
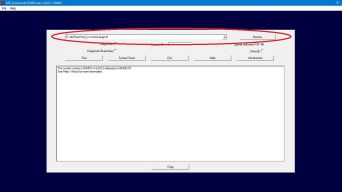 DMDX's primary dialog presents you with the name of the
item
file to be run and a browse button to change it. As of version 6.2.0.0
those item file names can contain any characters (prior to that options were
much more limited) and if you select an item file with extended characters in
it's name or with them in the path to that item file DMDX will prompt you to
turn the Unicode option on if it's not already on as DMDX's displays and data
files will use UTF-8 that allows encoding all characters and not just some of
them. Usually an item file,
it's resources (graphics and sound files) and the
data files generated are all found in
one directory -- although relative paths (so images\imagename.bmp for example)
for resources are in fact usable again, they were broken for a decade or so
and have since been fixed in 6.2.0.0.
DMDX's primary dialog presents you with the name of the
item
file to be run and a browse button to change it. As of version 6.2.0.0
those item file names can contain any characters (prior to that options were
much more limited) and if you select an item file with extended characters in
it's name or with them in the path to that item file DMDX will prompt you to
turn the Unicode option on if it's not already on as DMDX's displays and data
files will use UTF-8 that allows encoding all characters and not just some of
them. Usually an item file,
it's resources (graphics and sound files) and the
data files generated are all found in
one directory -- although relative paths (so images\imagename.bmp for example)
for resources are in fact usable again, they were broken for a decade or so
and have since been fixed in 6.2.0.0.
 It also has Diagnostic
check box that enables the standard DMastr debug mode where each item is
displayed and the item number is then recorded for a response time instead of
actually gathering a response from the subject. By default no branches are taken when the Diagnostic button is checked unless the
Diagnostic Branching check box is set. This is because when branching
was first implemented it was for repeating sections of items till some
criteria was met by the subject (ie branches were based on the RT) and in
diagnostic mode like as not the item file would continue looping forever as
the RTs were static (being based on the item number). Nowadays it's used
(by me anyway) as a control structure where branches are made based on the
contents of counters or
macros and diagnostic mode has
no use unless those branches are taken.
It also has Diagnostic
check box that enables the standard DMastr debug mode where each item is
displayed and the item number is then recorded for a response time instead of
actually gathering a response from the subject. By default no branches are taken when the Diagnostic button is checked unless the
Diagnostic Branching check box is set. This is because when branching
was first implemented it was for repeating sections of items till some
criteria was met by the subject (ie branches were based on the RT) and in
diagnostic mode like as not the item file would continue looping forever as
the RTs were static (being based on the item number). Nowadays it's used
(by me anyway) as a control structure where branches are made based on the
contents of counters or
macros and diagnostic mode has
no use unless those branches are taken.
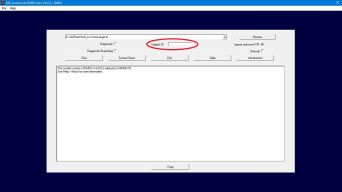 The
Subject ID field is an optional subject ID, if DTP data files are being used
then the first character of this is included in the binary data file, if
AZK or ZIL files are used then the whole string is included in the
output
file. The subject ID is also available in item files with
macro S.
The
Subject ID field is an optional subject ID, if DTP data files are being used
then the first character of this is included in the binary data file, if
AZK or ZIL files are used then the whole string is included in the
output
file. The subject ID is also available in item files with
macro S.
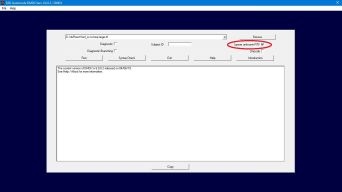 The Ignore unknown RTF check box is to override error messages resulting
from unusual file formats, see Item Files.
The Ignore unknown RTF check box is to override error messages resulting
from unusual file formats, see Item Files.
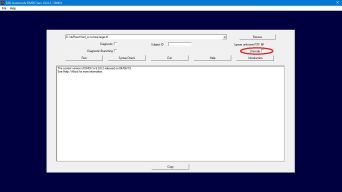 The Unicode check box
turns on the
Unicode code path. While DMDX itself is a
wide character Unicode aware application these days it used not to be and in
the past it just shredded all Unicode references in item files and you'd get
mojibake if your item relied on Unicode. In order to get it to pay
attention to the Unicode in your item file this check box has to be checked -- if you're unsure of
whether your item file contains Unicode references the Syntax check
(below) will tell you. Beyond enabling the use of
Unicode and extended characters in an item file's textual display and in
filenames for graphics, audio, and video resources as well as quoted input devices and button names the Unicode option also changes how items in
the diagnostics are displayed. Without the Unicode option active unless
a safe mode is in use
RTF control words are stripped
from the the frames in an item before it's printed to the
diagnostics and the main run dialog list
box when the item is executed
(unless it's got a skip display CR
indicator in which case it's not displayed at all), however prior to version
6.1.2.13 when the Unicode option was active RTF control words were left in
along with the wide character mark up \'00 sequences necessary to pass Unicode
characters to Windows functions making the diagnostics a bit of a challenge to
parse. Now DMDX can actually display UTF-8 characters in the diagnostics so
it parses items to produce something quite close to the human readable form of
the original item, the difference being that long items can have
ellipses (...) at the end of them when the item is too large for the diagnostic display and the
ellipsis indicates that not all characters were displayed. These
features also apply to item files with code page extended characters in them
(like those found in Asian fonts) so even if you don't need the Unicode path
turned on to display your items correctly turning it on beautifies DMDX's
diagnostic and error displays making them much more readable.
The Unicode check box
turns on the
Unicode code path. While DMDX itself is a
wide character Unicode aware application these days it used not to be and in
the past it just shredded all Unicode references in item files and you'd get
mojibake if your item relied on Unicode. In order to get it to pay
attention to the Unicode in your item file this check box has to be checked -- if you're unsure of
whether your item file contains Unicode references the Syntax check
(below) will tell you. Beyond enabling the use of
Unicode and extended characters in an item file's textual display and in
filenames for graphics, audio, and video resources as well as quoted input devices and button names the Unicode option also changes how items in
the diagnostics are displayed. Without the Unicode option active unless
a safe mode is in use
RTF control words are stripped
from the the frames in an item before it's printed to the
diagnostics and the main run dialog list
box when the item is executed
(unless it's got a skip display CR
indicator in which case it's not displayed at all), however prior to version
6.1.2.13 when the Unicode option was active RTF control words were left in
along with the wide character mark up \'00 sequences necessary to pass Unicode
characters to Windows functions making the diagnostics a bit of a challenge to
parse. Now DMDX can actually display UTF-8 characters in the diagnostics so
it parses items to produce something quite close to the human readable form of
the original item, the difference being that long items can have
ellipses (...) at the end of them when the item is too large for the diagnostic display and the
ellipsis indicates that not all characters were displayed. These
features also apply to item files with code page extended characters in them
(like those found in Asian fonts) so even if you don't need the Unicode path
turned on to display your items correctly turning it on beautifies DMDX's
diagnostic and error displays making them much more readable.
 When you're ready to have DMDX execute the selected item file click the Run button, press ESC when
the item file is finished to save the data (pressing ESC before the run is done
will prompt you to abort the job and no data will be saved, if you
accidentally abort a job it's data will be in
job1.zil). To exit DMDX click Exit, to use
another dialog just select it from the menu (the current DMDX and TimeDX dialogs
don't need to be exited manually).
When you're ready to have DMDX execute the selected item file click the Run button, press ESC when
the item file is finished to save the data (pressing ESC before the run is done
will prompt you to abort the job and no data will be saved, if you
accidentally abort a job it's data will be in
job1.zil). To exit DMDX click Exit, to use
another dialog just select it from the menu (the current DMDX and TimeDX dialogs
don't need to be exited manually).
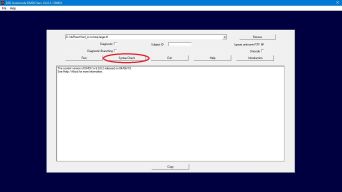 To perform a syntax check (analogous to
ICHECK) click the Syntax Check button (the screenshot below is a syntax check).
The syntax check will not display items as they are processed, nor will
it perform any branching -- it will parse the entire file and check for the
existence and integrity of any bitmaps or wave files (including cues or cursor names)
that are used, it even checks that the destinations of branches exist.
Note that the syntax check performs a number of additional checks that can
produce errors that are not performed during a run of an item file so it's
entirely possible to have an item file that fails a syntax check that
nonetheless produces data when run. This is by design as when I
introduce checks to catch legacy dubious behavior I can't break item files
that people may be using.
To perform a syntax check (analogous to
ICHECK) click the Syntax Check button (the screenshot below is a syntax check).
The syntax check will not display items as they are processed, nor will
it perform any branching -- it will parse the entire file and check for the
existence and integrity of any bitmaps or wave files (including cues or cursor names)
that are used, it even checks that the destinations of branches exist.
Note that the syntax check performs a number of additional checks that can
produce errors that are not performed during a run of an item file so it's
entirely possible to have an item file that fails a syntax check that
nonetheless produces data when run. This is by design as when I
introduce checks to catch legacy dubious behavior I can't break item files
that people may be using.
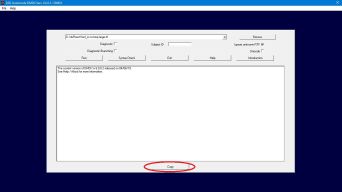 The Copy button under the diagnostics
window will copy the contents of the diagnostics to the clipboard, or at least
the last 8000 or so lines of it should it be longer. As of version
6.1.2.15 if the above mentioned Unicode option is active the clipboard will
contain Unicode characters so if your file has them in it they will be
preserved. In addition the first character in the file should be ॐ, the
Unicode Omkara (U+950), so if your text editor needs help figuring out what to
do with the character encoding that should help it figure things out (the
diagnostics.txt file will
begin with normal ANSI characters so a particularly old or clueless text
editor might not do so well reading the text file but may be able to handle
pasting stuff in from the clipboard).
The Copy button under the diagnostics
window will copy the contents of the diagnostics to the clipboard, or at least
the last 8000 or so lines of it should it be longer. As of version
6.1.2.15 if the above mentioned Unicode option is active the clipboard will
contain Unicode characters so if your file has them in it they will be
preserved. In addition the first character in the file should be ॐ, the
Unicode Omkara (U+950), so if your text editor needs help figuring out what to
do with the character encoding that should help it figure things out (the
diagnostics.txt file will
begin with normal ANSI characters so a particularly old or clueless text
editor might not do so well reading the text file but may be able to handle
pasting stuff in from the clipboard).
 To access the VOX dialog to set the threshold for the DigitalVOX device
use File / "Test Vox". To get back to this Run dialog use File / Run Item
File.
To access the VOX dialog to set the threshold for the DigitalVOX device
use File / "Test Vox". To get back to this Run dialog use File / Run Item
File.
Note that the dialog can appear narrower if
your monitor is not wide enough and as of version 6.1.9.0 it can be wider if
your monitor allows it.
DMDX Index.